Serial Codes Generator and Validator Documentation
Table of Contents
Quick Overview of the Basic Plugin Functionalities
What can you do with your Serial Code Validator plugin
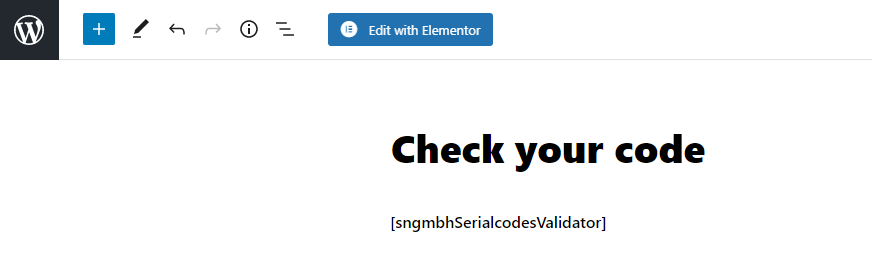
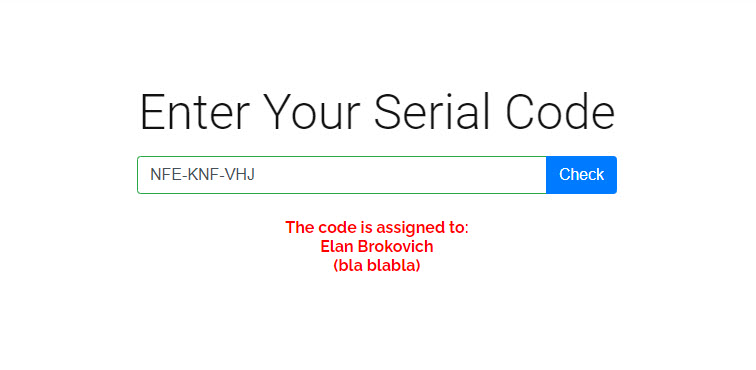
Create a page and add the shortcode [sngmbhSerialcodesValidator] to the page content. The plugin will replace this shortcode with the serial code check form. If you need a heading or additional instructions for your users, please add them accordingly using WordPress page editor.
URL Parameter to call the validation form
You add parameters to the URL that is opening the serical code validation form. The parameters control the form.
?code=XYZ

You can also trigger the validation. Useful to display the validation information and/or to trigger a redirect after the successfully validation.
?code=XYZ&action=validate
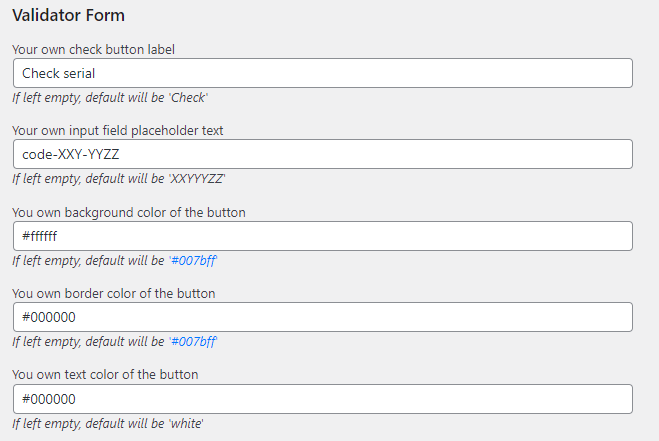
Serial Code Validator basic form style options
You can set basic styling options for the validation form for your users. If you are more experienced, you should consider to use CSS to style the form to your needs. Explained here.
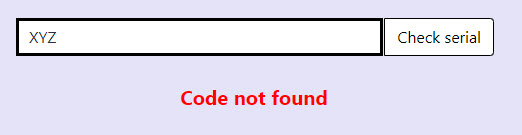
The shortcode will add the user form to validate codes. This form contains only an input field and a button. This allows you to add your own text and look&feel to the page.
Serial code validation messages
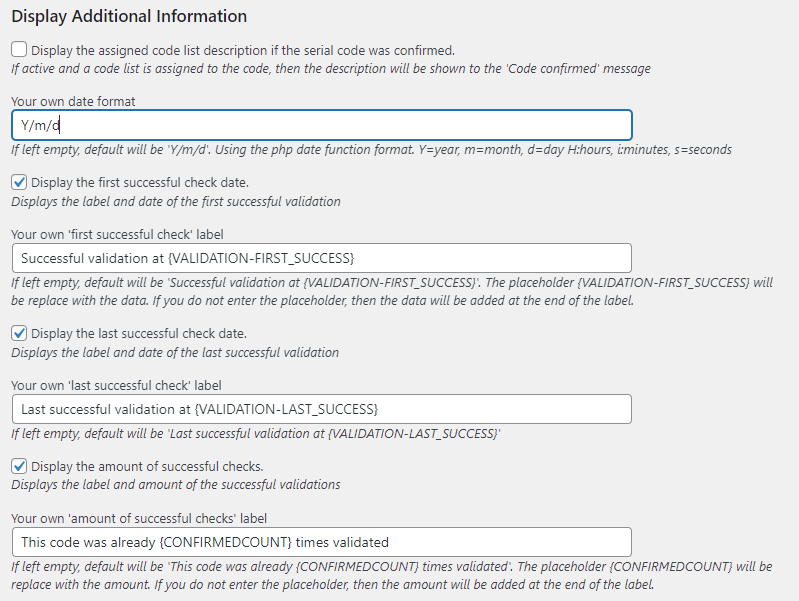
Depending on the status of the code, and if the code exists at all, a different message will be shown. You can adjust the messages in the options.
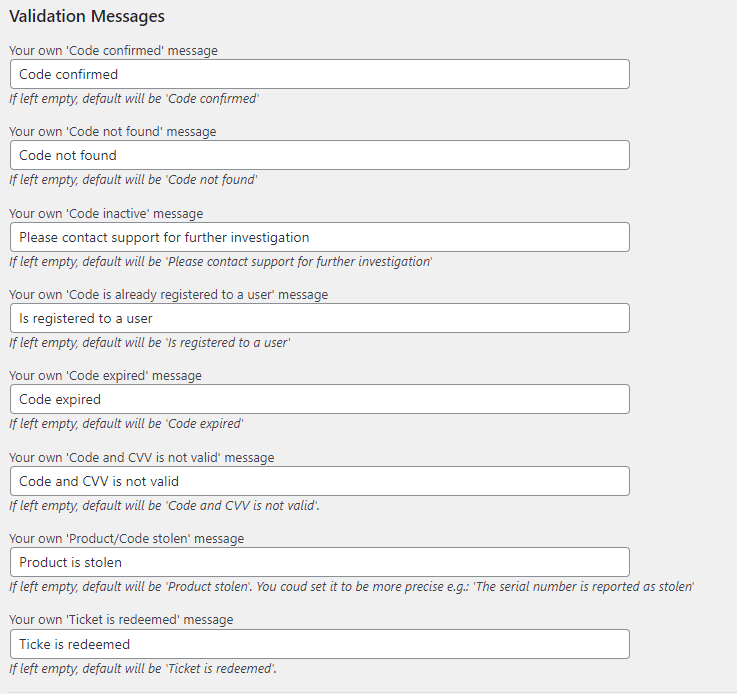
Additional Validation Message
Calling URLs from the serial code validator plugin
We have two options for calling URLs
1. Redirects
2. Webhooks
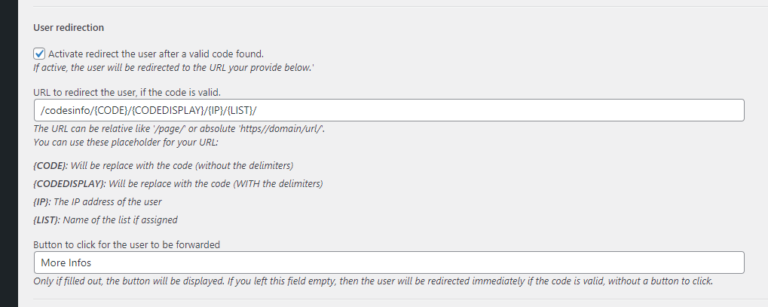
Redirects
You need to activate the redirect options within the option area.
You can enter the URL as an absolute (e.g. https://vollstart.com/) or relative (e.g. /page/) URI. This redirect URL will be executed on the frontend. If you do not enter a button label, then the user will be redirected to the URL immediately if the code is valid. If you enter a button label, the user need to click on the button to be forwarded.
Webhooks
URL format & syntax
How to build an URL for a webhook call?
We offer 5 placeholder: {USERID}, {CODE}, {CODEDISPLAY}, {IP}, {LIST}, {LIST_DESC}
Please be aware that the placeholders are case sensitive. The easiest way is to copy & paste the placeholder with the brackets into your URL.
Additional, you can use also these replacement tags in your text messages and URLs for the meta code values
{USER_VALUE}: Value given by the user during the code registration.
{USER_REG_IP}: IP address of the user, register to a code.
{USER_REG_USERID}: User id of the registered user to a code. Default will be 0.
{USED_REG_IP}: IP addres of the user that used the code.
{CONFIRMEDCOUNT}: Amount of how many times the code was validated successfully.
{WOOCOMMERCE_ORDER_ID}: WooCommerce order id assigned to the code.
{WOOCOMMERCE_PRODUCT_ID}: WooCommerce product id assigned to the code.
{WOOCOMMERCE_CREATION_DATE}: Creation date of the WooCommerce sales date.
{WC_RP_ORDER_ID}: WooCommerce order id, that was purchases using this serial code as an allowance to purchase a restricted product.
{WC_RP_PRODUCT_ID}: WooCommerce product id that was restricted with this serial.
{WC_RP_CREATION_DATE}: Creation date of the WooCommerce purchase using the allowance code.
Example:
Userid (empty if the user is not logged in): userid
Display-Code: NYA-ZER-TER
Code: NYAZERTER
Name of the list the code is assigned to: myList
IP of the user: 1.2.3.4
The webhook example URL:
https://vollstart.com/anotherService/{LIST}/{CODE}/?code={CODEDISPLAY}&ip={IP}
will be translated by the plugin into:https://vollstart.com/anotherService/myList/NYAZERTER/?code=NYA-ZER-TER&ip=1.2.3.4 and then the URL will be called by your wordpress server.
On option 1 (Redirect), the browser will go tohttps://vollstart.com/anotherService/myList/NYAZERTER/?code=NYA-ZER-TER&ip=1.2.3.4
On option 2 (Webhook), your server will call the URL in the backgroundhttps://vollstart.com/anotherService/myList/NYAZERTER/?code=NYA-ZER-TER&ip=1.2.3.4
Shortcode optional parameters
The examples are displaying the shortcodes. If you copy & paste the shortcode, they will not work. I needed to add a space before the shortcode name, to prevent WordPress from rendering the shortcode.
Limit the search results to a code list
You can use the parameter list_id=”0″. The value is the code list id, visible if you edit your code list.
If the code exists, but the list id is wrong, then it will behave like the serial was wrong.
[ sngmbhSerialcodesValidator list_id="" ]
Use your own form
You can use your own HTML input, output and trigger component for the check.
If you add the parameters (all 3 mandatory to use this feature), then the default input area will not be rendered.
					[ sngmbhSerialcodesValidator
    inputid=""
    triggerid=""
    outputid=""
]
inputid
The component with the set HTML-ID will be used as the input element. It need to be an HTML input element.
We will access the value-parameter of it.
					[ sngmbhSerialcodesValidator
    inputid=""
    triggerid=""
    outputid=""
]
triggerid
The onclick event of the component with this HTML-ID will be replaced by our function in order to call the server validation for the code.
					[ sngmbhSerialcodesValidator
    inputid=""
    triggerid=""
    outputid=""
]
outputid
The component with the provided HTML-ID on this parameter will be used for the server answer – the output.
It cannot be empty. If you want to hide the output, hide it using css style commands.
The content of this component will be replaced by the server result after the check . We will use the innerHTML property of it, so use a DIV, SPAN, TD or similar for best results.
If you need to control the form depending on the result of the serial code check, then please consider using one or both of the additional optional parameter for your own JavaScript callback functions.
[ sngmbhSerialcodesValidator
inputid=""
triggerid=""
outputid=""
]
Use your own JavaScript callbacks and gain more control
You can add JavaScript function names, that are called before and after the check.
Both parameters are optional and not required.
[ sngmbhSerialcodesValidator jspre="" jsafter="" ]
These parameters can be combined with the input and output parameters.
jspre
If you want to control or manipulate the input before it is sent to the server, then use this parameter.
The function will be called. The input parameter for the function will be the code.
If your function returns a value, than this returned value will be used. If nothing is returned or an empty string, then the entered code of the user will be used.
					[ sngmbhSerialcodesValidator
    jspre="mySerialCodePre"
    jsafter=""
]
Example function
Add your JavaScript code to your page, so that it can be called from the serial code plugin. Make sure the function name your are using for the jspre-call is matching, the jspre attribute value. The input parameter is a string with the user entered code.
					function mySerialCodePre(myCode) {
    // console.log(myCode);
    return myCode;
}
jsafter
The function will be called. The input parameter will be the result JSON object from the server.
The content differs (depending on the activated options) and can be extended in the future. Please inspect the result first, before relying on the available property.
If you want to use the result as a form controlling mechanism check for the returned property: data.valid
The data.valid === 1 is true, if the serial code was valid and unsed.
					[ sngmbhSerialcodesValidator
    jspre=""
    jsafter="mySerialCodeAfter"
]
Example function
Add your JavaScript code to your page, so that it can be called from the serial code plugin. Make sure the function name your are using for the jsafter-call is matching, the jsafter attribute value. The input parameter is a JSON object returned from the server after the serial code was evaluated.
					function mySerialCodeAfter(data) {
    // console.log(data);
    if (data.valid === 1) {
        // do your thing
    }
}
Shortcode to display users assigned serial codes
You can display the assigned (to a user registered) serial codes within a page. Use the following shortcode for this.
[ sngmbhSerialcodesValidator_code ]
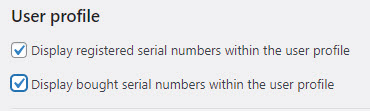
Display codes within the user profile
You can also activate the options to display the user serials within their profile.
Worpress filters for the pre and after check option
You can use the “add_filter” function to register your PHP functions. They will be called and expected a specific return value. With this option you can extend the serial code validation check by yourself.
Before the code check pre
This filter will be called right after the parameter check. You can change the $data[‘code’] before it is used to perform the internal pre checks.
					add_filter('sngmbh_serial-code_beforeCheckCodePre', 'myfunc', 20, 1);

/**
* param $data assoc array contains the code from the validator form $data['code'];
*/
function myfunc($data) {
    $code = $data['code'];
    return $data;
}
Before the code check
This filter will be called after some initial checks are passed. After this the code will be evaluated.
					add_filter('sngmbh_serial-code_beforeCheckCode', 'myfunc', 20, 1);

/**
* param $data assoc array contains the code pre analyzed code $data['code']
*/
function myfunc($data) {
    $code = $data['code'];
    return $data;
}
After the check pre
The check is performed and the serial code is evaluated. The code object is available, but only filled if the serial was found. The status can be checked. This filter is called before the additional after operations are executed, like IP block, status messages and more.
					add_filter('sngmbh_serial-code_afterCheckCodePre', 'myfunc', 20, 1);

/**
* param $codeObj contains the serial if found
*/
function myfunc($codeObj) {
    // print_r($codeObj);
    // echo $codeObj['status'];
    // echo $codeObj['_valid'];
    // echo $codeObj['aktiv'];
    return $codeObj;
}
After the check
This filter will be called after all the additional operations are done. The webhook trigger is send.
The returned values to the validator form will be $codeObj[‘_valid’] and $codeObj[‘_retObject’].
					add_filter('sngmbh_serial-code_afterCheckCode', 'myfunc', 20, 1);

/**
* param $codeObj assoc array
*/
function myfunc($codeObj) {
    // echo $codeObj['_valid'];
    // var_dump($codeObj['_retObject']);
    return $codeObj;
}
Styling
The frontend will be rendered by the Javascript file. The elements will have css classes, that you could override.
The actual used CSS file can be view here: Open the CSS file
					<div id="sngmbhSerialcodesValidator">
   <div class="sngmbh_container">
      <div class="sngmbh_container">
         <div class="sngmbh_input-group sngmbh_mb-3">
            <input required="" type="text" class="sngmbh_form-control sngmbh_mb-2" data-input="sngmbhSerialcodesValidatorcode" placeholder="XXYYYZZ">
            <div class="sngmbh_input-group-append">
               <button type="submit" data-btn="sngmbhSerialcodesValidatorbtn" class="sngmbh_btn sngmbh_btn-primary sngmbh_mb-2">Check</button>
            </div>
         </div>
      </div>
      <div></div>
   </div>
</div>
Form validation look and feel is controled by 2 css classes:
					.sngmbh_is-invalid, .was-validated .sngmbh_form-control:invalid {
    border-color: #dc3545;
    padding-right: calc(1.5em + .75rem);
    background-image: url(data:image/svg+xml,%3csvg xmlns='http://www.w3.org/2000/svg' width='12' height='12' fill='none' stroke='%23dc3545' viewBox='0 0 12 12'%3e%3ccircle cx='6' cy='6' r='4.5'/%3e%3cpath stroke-linejoin='round' d='M5.8 3.6h.4L6 6.5z'/%3e%3ccircle cx='6' cy='8.2' r='.6' fill='%23dc3545' stroke='none'/%3e%3c/svg%3e);
    background-repeat: no-repeat;
    background-position: right calc(.375em + .1875rem) center;
    background-size: calc(.75em + .375rem) calc(.75em + .375rem);
}
.sngmbh_is-valid, .was-validated .sngmbh_form-control:valid {
    border-color: #28a745;
    padding-right: calc(1.5em + .75rem);
    background-image: url(data:image/svg+xml,%3csvg xmlns='http://www.w3.org/2000/svg' width='8' height='8' viewBox='0 0 8 8'%3e%3cpath fill='%2328a745' d='M2.3 6.73L.6 4.53c-.4-1.04.46-1.4 1.1-.8l1.1 1.4 3.4-3.8c.6-.63 1.6-.27 1.2.7l-4 4.6c-.43.5-.8.4-1.1.1z'/%3e%3c/svg%3e);
    background-repeat: no-repeat;
    background-position: right calc(.375em + .1875rem) center;
    background-size: calc(.75em + .375rem) calc(.75em + .375rem);
}
The ajax call progress is rendered dynamically with the CSS rule: “lds-dual-ring“. It will be injected if it is not defined. To overrule this look and feel, just create the CSS rule with your values.
The progress wheel (spinner) is rendered by:
					<div id="sngmbhSerialcodesValidatorspinner">
    <span class="lds-dual-ring"></span>
</div>
Here is the default CSS rule of the progress wheel:
					.lds-dual-ring {
    display:inline-block;
    width:64px;
    height:64px;
}
.lds-dual-ring:after {
    content:" ";
    display:block;
    width:46px;
    height:46px;
    margin:1px;
    border-radius:50%;
    border:5px solid #fff;
    border-color:#2e74b5 transparent #2e74b5 transparent;
    animation:lds-dual-ring 0.6s linear infinite;
}
@keyframes lds-dual-ring {
    0% {
        transform: rotate(0deg);
    }
    100% {
        transform: rotate(360deg);
    }
}
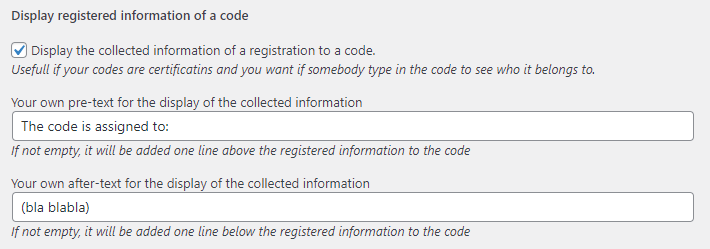
Display registered information to a code
You can ask the user to register to a code after a successfull serial code validation check.
You can also display this information to the next user who checks this code.
This allows you basically to a database, where users can check a serial code. Maybe printed on a certification or personal ID.
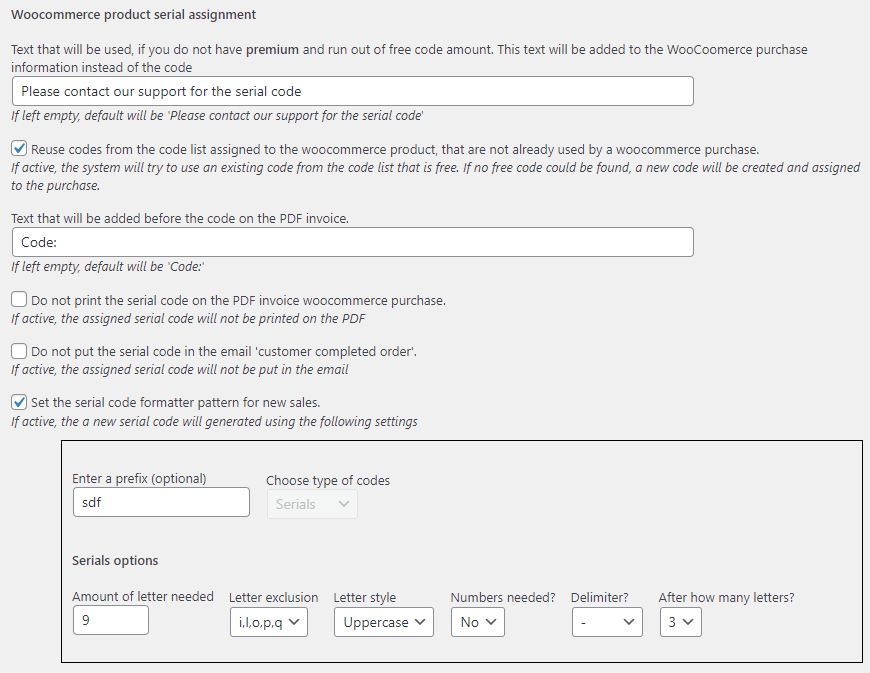
WooCommerce product serial assignment
Optional. If you use WooCommerce, you can profit from our plugin too.
You can assign a code list to a product. A new code will be generated with the purchase and assigned to the order.
It is possible to reuse existing unassigned codes in the code list. This way you can reuse codes that are marked again as unused for your refunded orders. The serial code will be added to the purchase email within the product table. And also will be printed on the optional plugin “WooCommerce PDF Invoices”.
The default format for a new generated code will be 20 letters with a “-” delimiter. E.g. abcde-abcde-abcde-abcde
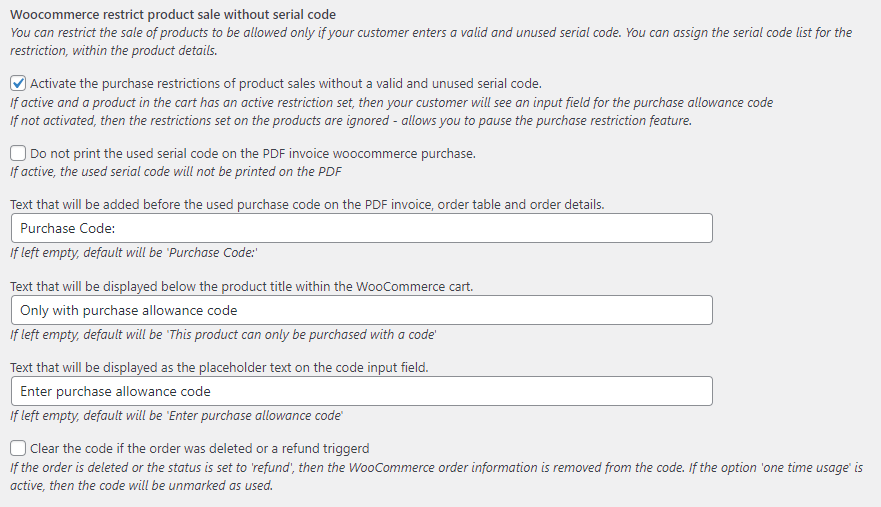
WooCommerce restrict product sale without serial code
Optional. If you use WooCommerce, you can profit from our plugin too.
You can restrict the sale of products to be allowed only if your customer enters a valid and unused serial code. You can assign the serial code list for the restriction, within the product details.
Your customer can receive from you a serial code out of the code list that is assigned to your WooCommerce product. They can use the code to buy as many as products as protected with this code. Or you allow only a “one time use”. If you activate the “one time use” option, then you can reuse a code used on refunded orders. Please activate for this the “Clear the code if the order was deleted or a refund triggered” option.
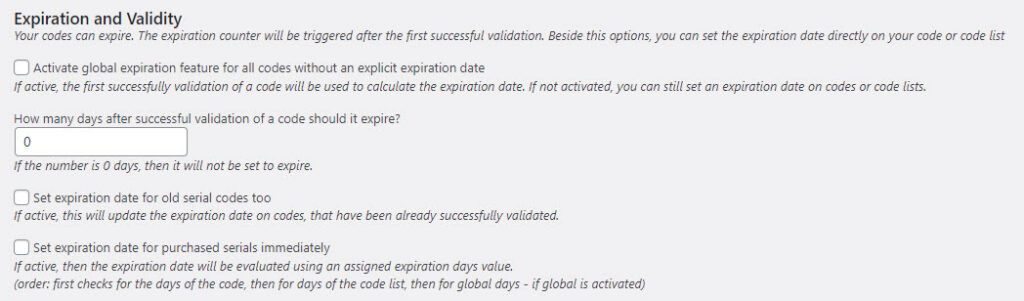
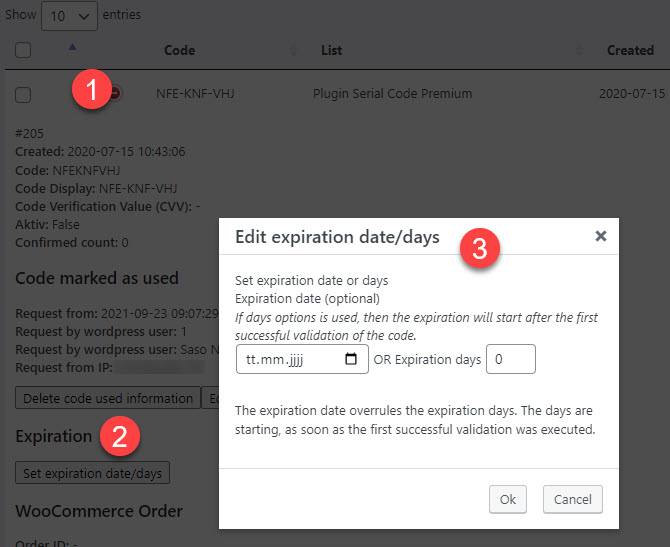
Expiration and validity of serials
Only for premium users.
You can activate to let your serial codes expire. A check after expiration will result in the “expired message” to your users.
You can always add an expiration date as days from the first successfull check or creation date to any code.
Additional you can start tracking old codes also. To do this, activate the global expiration option. This will have an effect for all validation checks from now on.
Enter the days how long the serial is valid untill it expires. Used for the global setting. If a code was already successful validated by the user, then this date will be used to calculate if the code is expired.
If you want to expire also old codes in your database, then you can activate the option for it.
For WooCommerce sales generated serials, you can activate the expiration date calculation right from the purchase date. So your customer do not need to validate them first to start the expiration countdown.
Additional you can edit the validation directly on the serial code, via code list and on the WooCommerce product.
IP block against brute force attacks (premium only)
You can activate the IP blocker to protect your server from bruteforce checks. That way they cannot try out serial codes untill they found a correct one.
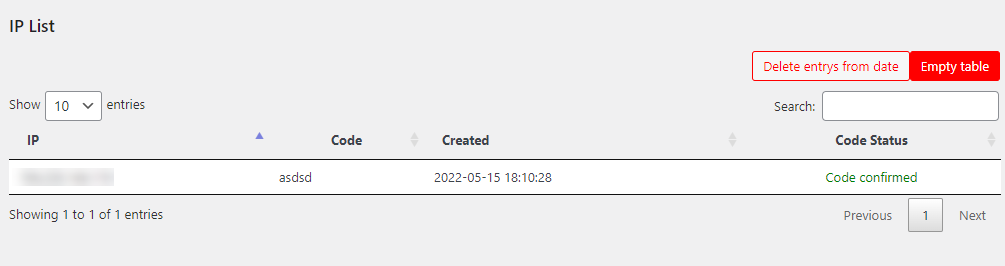
IP log history
You can activate the IP log history and track the usage. You will see the IP address and the used code for the check. The code status shows you the return value of the validation check.
You can delete the history also untill a date to clean up your database and free some space.
Sell software & deliver protected downloads
New in version 3.1. Turn your serial codes into download keys and sell software, digital products or any file straight from WordPress. Every serial code in a code list can unlock the files you attach to that list.
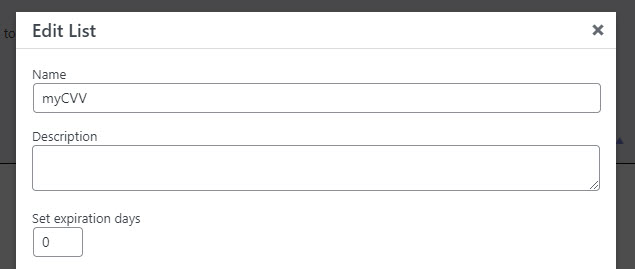
How to set it up
- Open a code list in the Serial Codes admin (edit an existing list or create a new one).
- In the Downloadable files section of the list dialog, upload the file(s) you want to deliver — your software, a PDF, an e-book, a license file, anything.
- Save. Every serial code in that list now unlocks those downloads.
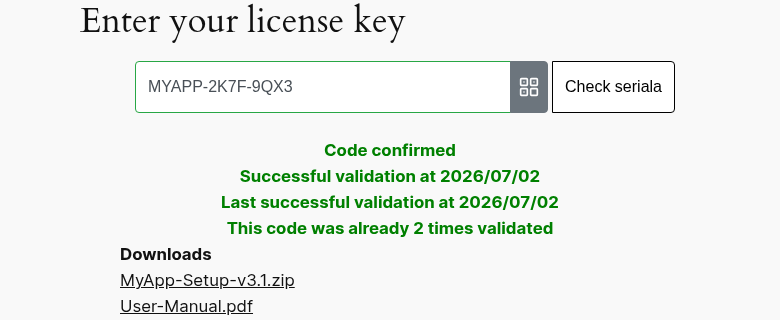
How your customer gets the file
- After a successful validation on your validator form, download links appear right below the result.
- Logged in customers also see their downloads in the “my codes” shortcode.
Why it is safe
- Protected storage: files are kept in a folder that is blocked from direct web access, so nobody can guess the URL and grab your file.
- Code-gated: downloads are only served through a secure endpoint that re-validates the serial on every single request. The serial code is the credential — like a license key — so no account is required unless you want one.
- Resume & download managers: large files support HTTP Range requests, so paused or interrupted downloads simply continue.
- Emergency off: a single global switch (Options → File downloads) instantly blocks every download and hides all links — handy if you uploaded the wrong file.
Premium download controls
- Download limits & logging: limit how often each code may download a file (0 = unlimited) and log every download (code, file, IP, time).
- Expiration cut-off: an expired serial code can no longer download — expiry is checked on every request.
- Login required: restrict downloads to logged in WordPress users. Guests are sent to the WordPress login form and brought straight back to their download after signing in (or simply blocked with a 403, your choice).
- WooCommerce delivery: the download links are added to the order details, the confirmation email and the PDF invoice, so buyers get their software the moment they purchase.
- {DOWNLOAD_URL} redirect: forward the buyer straight to their download after a successful validation.
Software Licensing API
Integrate license activation into your own software via our REST API: activate, validate, deactivate and version-check serial keys, with per-installation activation limits, optional API keys (bindable to a code list and allowed IPs) and brute-force protection.
FAQ's
Yes. You can copy and paste your codes within the “adding codes” area.
Or you upload the text/csv file and import your codes within the “Add codes area”. (premium only)
Please see also this video:
https://vollstart.com/serial-
Yes, absolutely.
That is the basic functionality of this plugin.
Yes, but only with the premium plugin.
Yes, the confirmed checks are displayed on the code details and is labeled “Confirmed count:”
